
Thursday, January 19, 2012
Gluing the deck beam
Wednesday, January 18, 2012
My tools are older than I am..
With the four main panels cut, I plowed into cutting the rest of the pieces - the forward and aft hatch covers, risers, doublers, and so forth. It seems like a lot of parts when you first see the plans, but there's really a surprisingly small number of parts and pieces. I think it speaks well of the CLC folks and their design - to paraphrase A. Einstein, this boat seems to be as simple as possible, but not more so.
 Along with cutting panels, I also scarfed the sheer clamps together to make 16 feet lengths of 3/4" by 1 1/2" straight grain fir. The plans call for a conservative 8:1 scarf angle rather than the customary 12:1 because these pieces will be joined to the side panels, which in turn will be glassed, so an 8:1 joint will be plenty strong. For 3/4" stock, 8:1 means a six inch hypotenuse. The Japanese pull saw is the ticket for cutting scarfs in this kind of stock. It's really easy to get accurate results if you go carefully. I marked the angle, dropped a perpendicular as a guide to make sure I was cutting square, and cut these four ramps by hand in about 15 minutes. A couple of minutes touch-up with the plane and they were ready to glue.
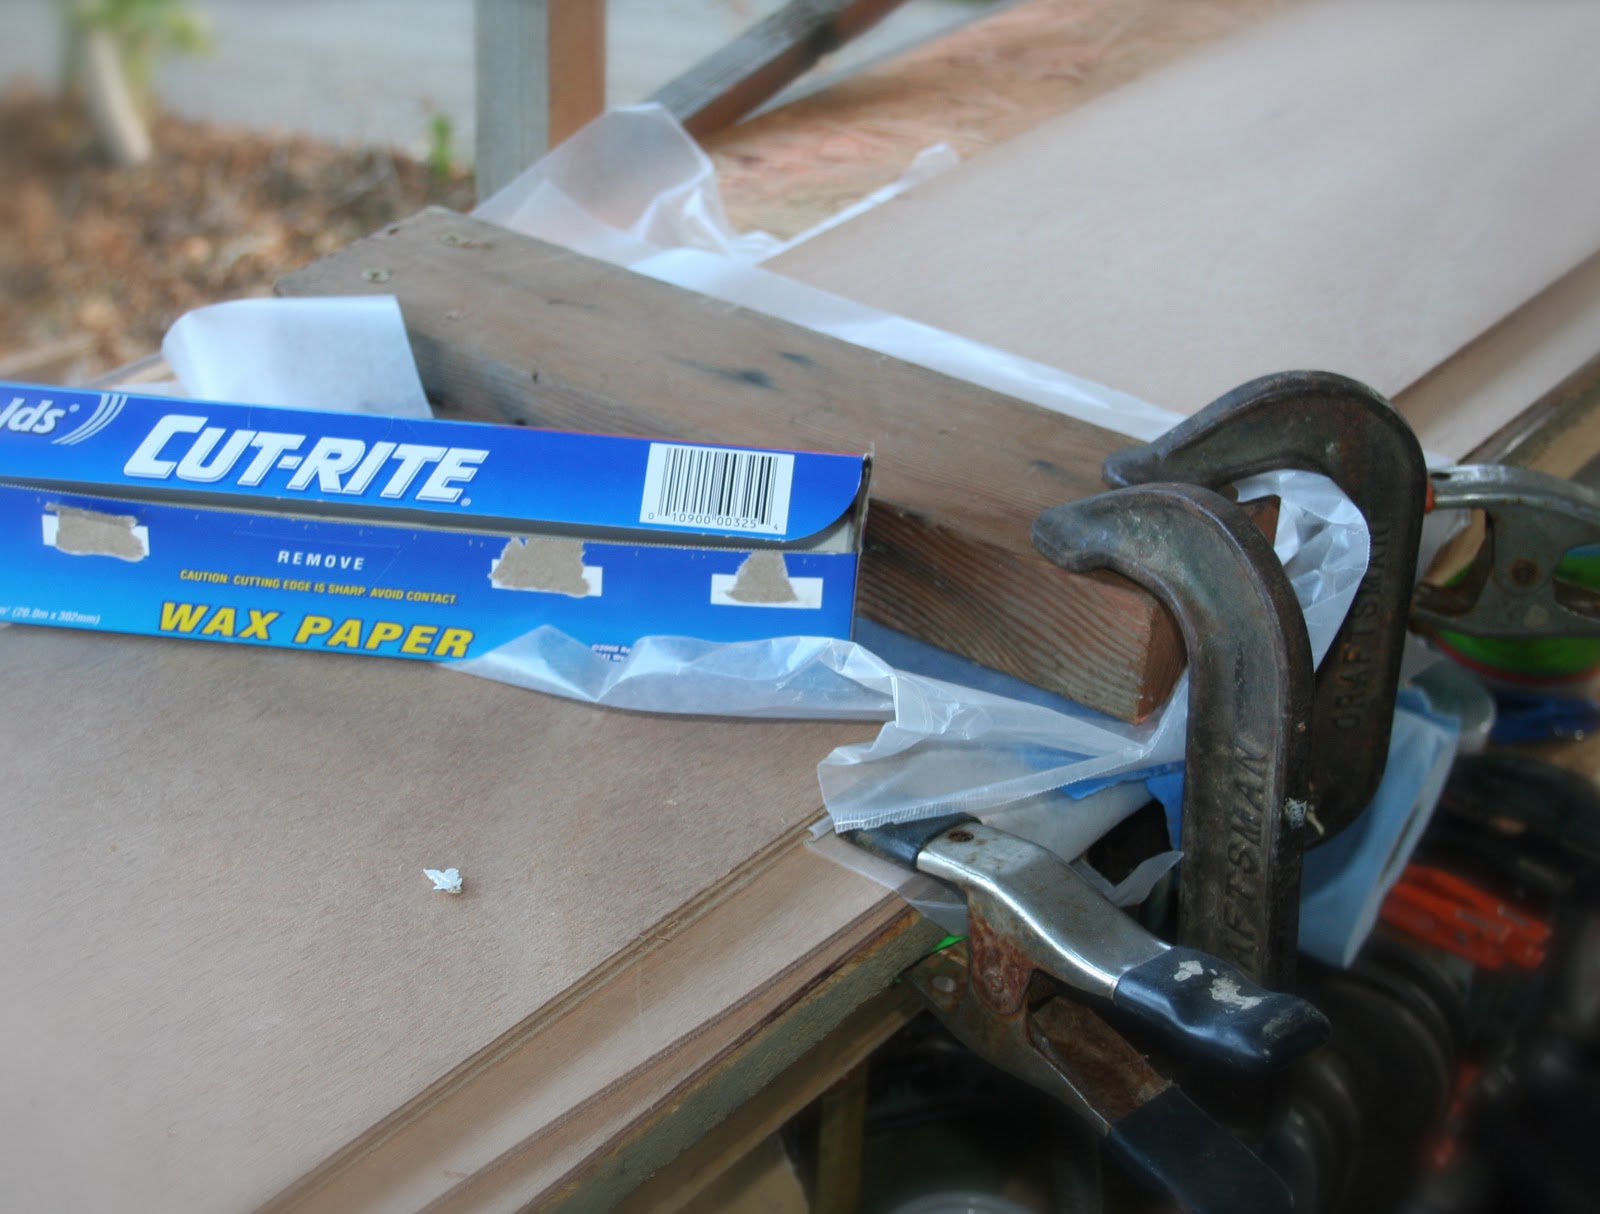
I followed the same gluing procedure as I did with the ply: put down some wax paper, align the sticks along the front edge of my benchtop to make sure they're straight, slather some epoxy thickened with wood flour onto the scarf (I used dust from my sander again), position them longitudinally, send a finish nail through the joint to keep the sticks from sliding under clamping pressure (I drilled a pilot hole to make it easy), and repeat with the other two pieces to make a stack two high, then clamp the stack. It's another cold night, so I'll put a cardboard box around the glue joint and put a light inside.

I followed the same gluing procedure as I did with the ply: put down some wax paper, align the sticks along the front edge of my benchtop to make sure they're straight, slather some epoxy thickened with wood flour onto the scarf (I used dust from my sander again), position them longitudinally, send a finish nail through the joint to keep the sticks from sliding under clamping pressure (I drilled a pilot hole to make it easy), and repeat with the other two pieces to make a stack two high, then clamp the stack. It's another cold night, so I'll put a cardboard box around the glue joint and put a light inside.
Tuesday, January 17, 2012
Laying out the panels
After the epoxy cured, I cleaned the panels up with a sander then marked the stations according to the offsets in the plans and laid out the sides and bottom panels using a fairing baton. Here, I'm transferring the full-size bow profile from the plans onto one of the bottom panels by poking a sharp awl through the paper into the wood. I cut a little window out of the plans so I could see to line up the paper correctly. Next I"ll screw the two side blanks together, and the two bottom blanks together, cut them out with a jigsaw two at a time, and finally touch up the edges with a hand plane.
Sunday, January 15, 2012
Lam Sandwich

Saturday, January 14, 2012
8 + 8 = 16LT

 So with your sharp tool at the ready, you measure 1 1/4 inches and mark a line on each panel, offset a stack of panels to these lines, with the bottom one aligned with the edge of your workbench, and start planing. The stair-step panel arrangement holds the plane at the proper angle, and it's really quite easy to cut the scarfs uniformly - the ply reveal gives you a constant indicator of how even you're cutting. (BTW, I built the workbench with this project in mind: it's about 12' long and 14" wide - plenty adequate for the project but it doesn't take up my whole porch.)
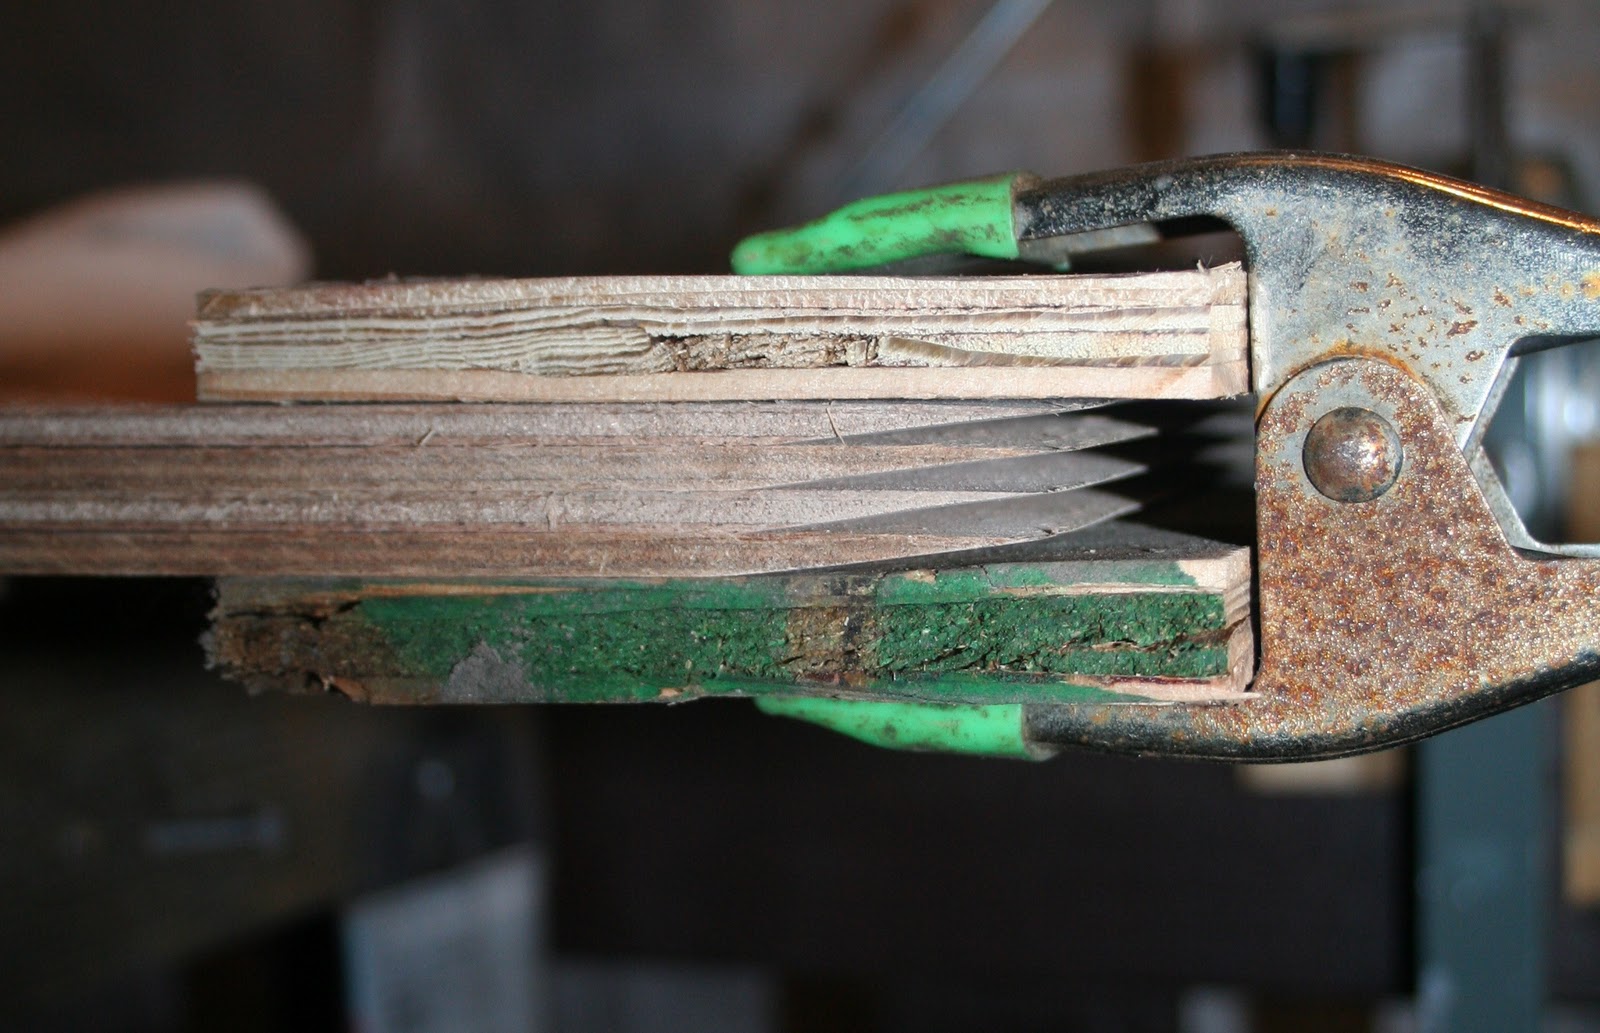
The first cut is the deepest
 Here's a nice exploded view of the kayak from the construction manual.
If you order the kit, it comes with all the pieces pre-cut. If you're building from
plans only, you get to make them yourself.
Here's a nice exploded view of the kayak from the construction manual.
If you order the kit, it comes with all the pieces pre-cut. If you're building from
plans only, you get to make them yourself.At $70 a sheet, you measure at least three times and cut once. The sides and bottom panels start out as straight rips. If you're working by yourself, 4X8 sheet product is not wieldy especially if you don't have the luxury of having a table saw set up for cutting panels, so to help hold the outflow to prevent the sheet from flipping up off the blade I nailed a support to the porch rail.
Materials
 The boat goes together from 3 sheets of 4mm Okoume marine plywood and a half sheet of the 6mm. It ain't cheap (~ $70 a sheet), but it's very high quality. Because I'm a cheap bastard, I was tempted to use lauan at $10 a sheet, but if you've ever used lauan, you know that it's full of voids and the filler between the plies is flimsy wooden styrofoam. Of course, Allen's boat uses rigid foam between epoxy and glass and it's stupendously strong, and given that most of the strength derives from the layup of epoxy and glass, I suspect that lauan would work just fine. But word from the CLC shop tips page nudged me up the food chain. Since I'll be putting a few hundred bucks worth of epoxy, glass, and fittings into the boat, I decided to throw in for good wood. I got it from the folks at Edensaw in Port Townsend, WA, along with some clear straight grain fir for the sheer clamps.
O.K., so here's really the way it fell out. Uncle Stinky bought this wood from Edensaw so that he could build a kayak at the same time as Crescent, but with his many projects in the works, this one didn't come to fruition before his travels continued. He generously left the wood in the greenhouse for us to use. Thus, I'm making a boat from really quality wood. Those who know Uncle Stinky know that he never never never buys cheap shite - only the best. In this case, Joubert Ply.

The Joubert seal signifies that it meets or exceeds British Standard 1088. It's registered with Lloyds of London to be free of voids, be of uniform thickness and be glued together with uniform glue spread and pressure, and to be low in formaldehyde out-gassing - as if I give a shite about out-gassing. But if it's good enough for Lloyd and for Uncle Stinky, I'm sure it'll work for me.
Friday, January 13, 2012
I have a plan...
 The plans and construction manual cost $70, which gets you a detailed step-by-step procedure, drawings with offsets, and full-sized templates for the tricky shapes, like the lines on the bow and stern, the hatch coaming pieces, and the like. Also, with the purchase of a plans set (which is really a build license), you get to call the CLC shop in Annapolis and ask questions. These are really Crescent's plans - she's gonna build her boat later. When she starts, we'll send CLC another 10 bucks for an additional build license.
The plans don't actually come in the wooden box. I threw that together to give Crescent the plans in for her birthday. It's made of scrap redwood left over from the outdoor shower I built in September, which was made of scrap redwood from the city dump. I'm a cheap bastard.
What to build

So, while my brother is busy in Hood River, Oregon, building Mariana, an ultra high-tech blue water 44 foot sailing catamaran, I decided to knock together a more modest vessel here in Santa Cruz. If my job doesn't get in the way of my free time, I'll be paddling my Chesapeake Light Craft 16LT kayak out past the point break at Steamer Lane by
I chose the CLC boat because quite a number of people posted favorable things about it on the Internet, including a bunch of readers of Sea Kayaker magazine (who knew there was a mag for sea kayakers). They voted it the best D-I-Y kayak out there. I know fock-all about kayaks, but you gotta assume that the readership of SK mag is obsessed with them, so it seemed like a good enough endorsement.
Subscribe to:
Posts (Atom)