Friday, April 6, 2012

Coaming in pieces

I decided to do the glue-up of the coaming in two stages, partly to make it easier to handle, and partly so that I could clean up the outer edges of the spacers. First, I clamped them in place and marked the cockpit hole, and cut it out fairly close (+1/4 inch) to the actual size to make clamping easier. Next I slathered the spacers with thickened epoxy and clamped them in place with a layer of wax paper under them so they wouldn't stick to the deck. The result: two spacers, formed to fit the curve of the deck. The picture shows them with the outer edges sanded.

Gluing the coaming assembly to the deck was a bit fiddly. It took a lot of clamps.

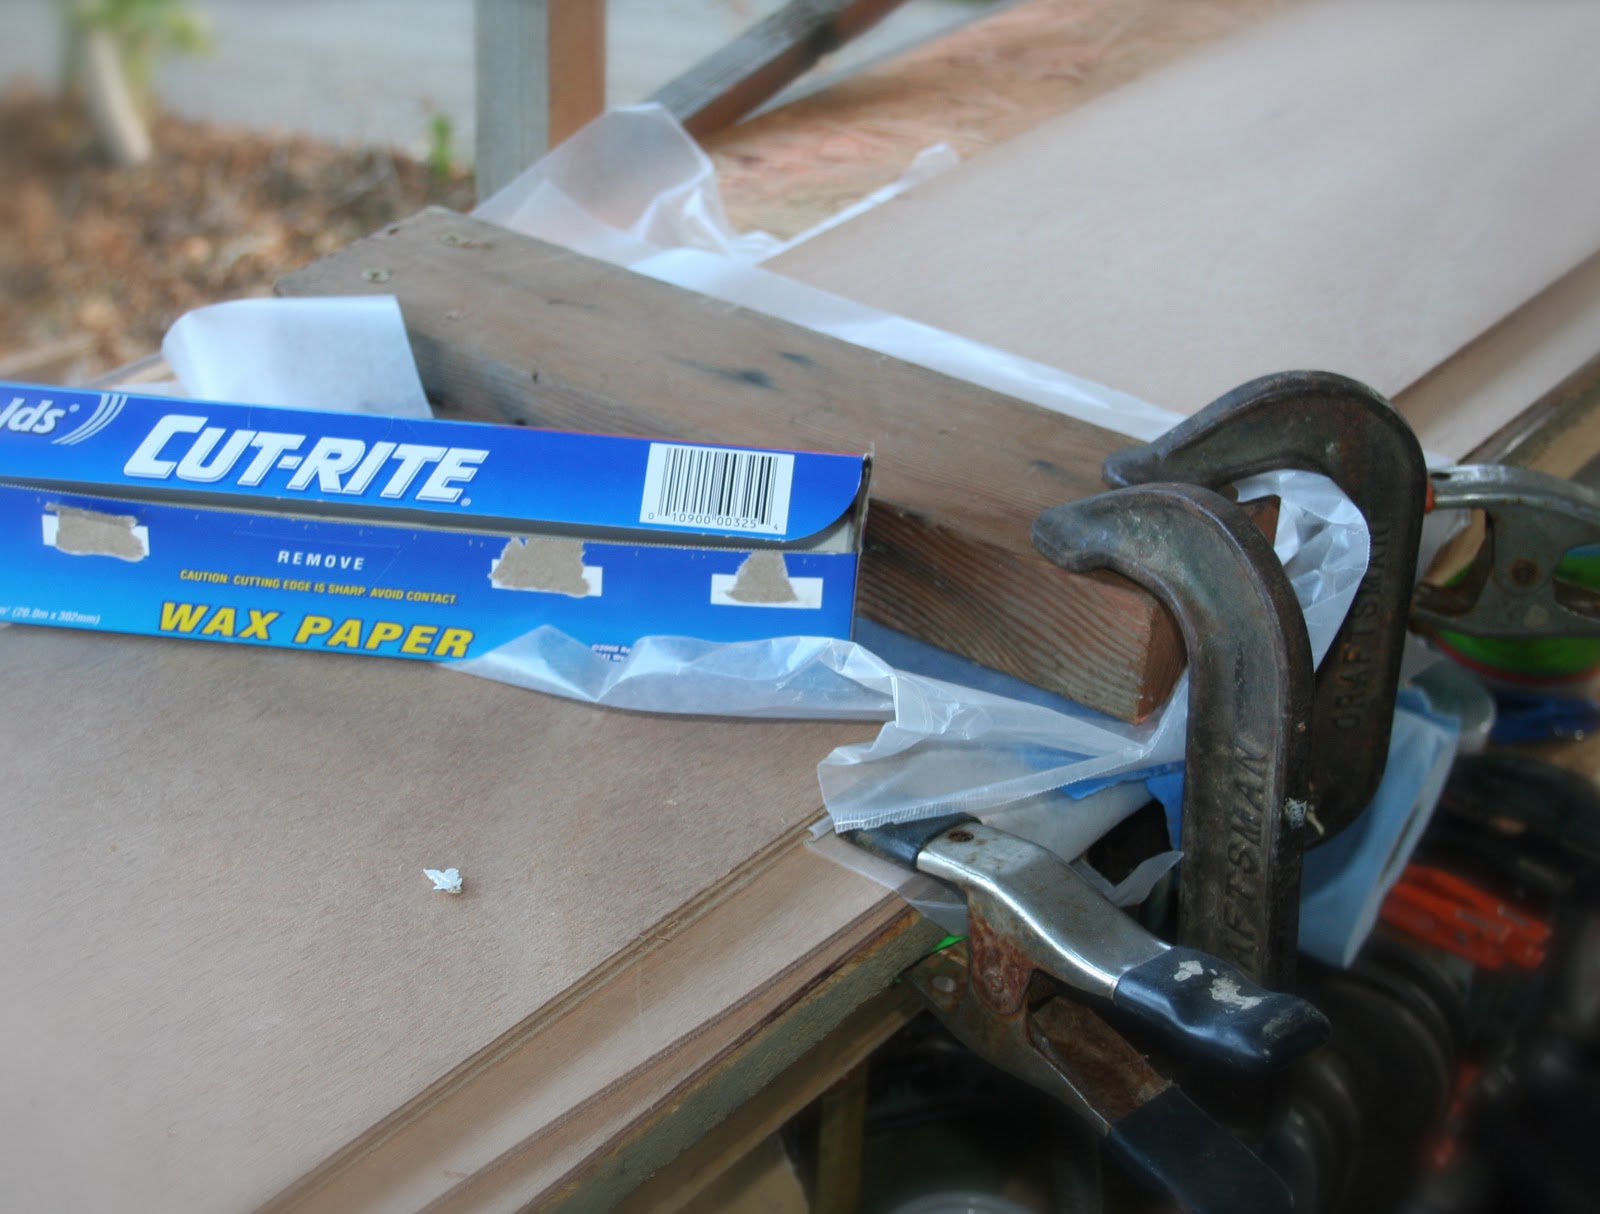
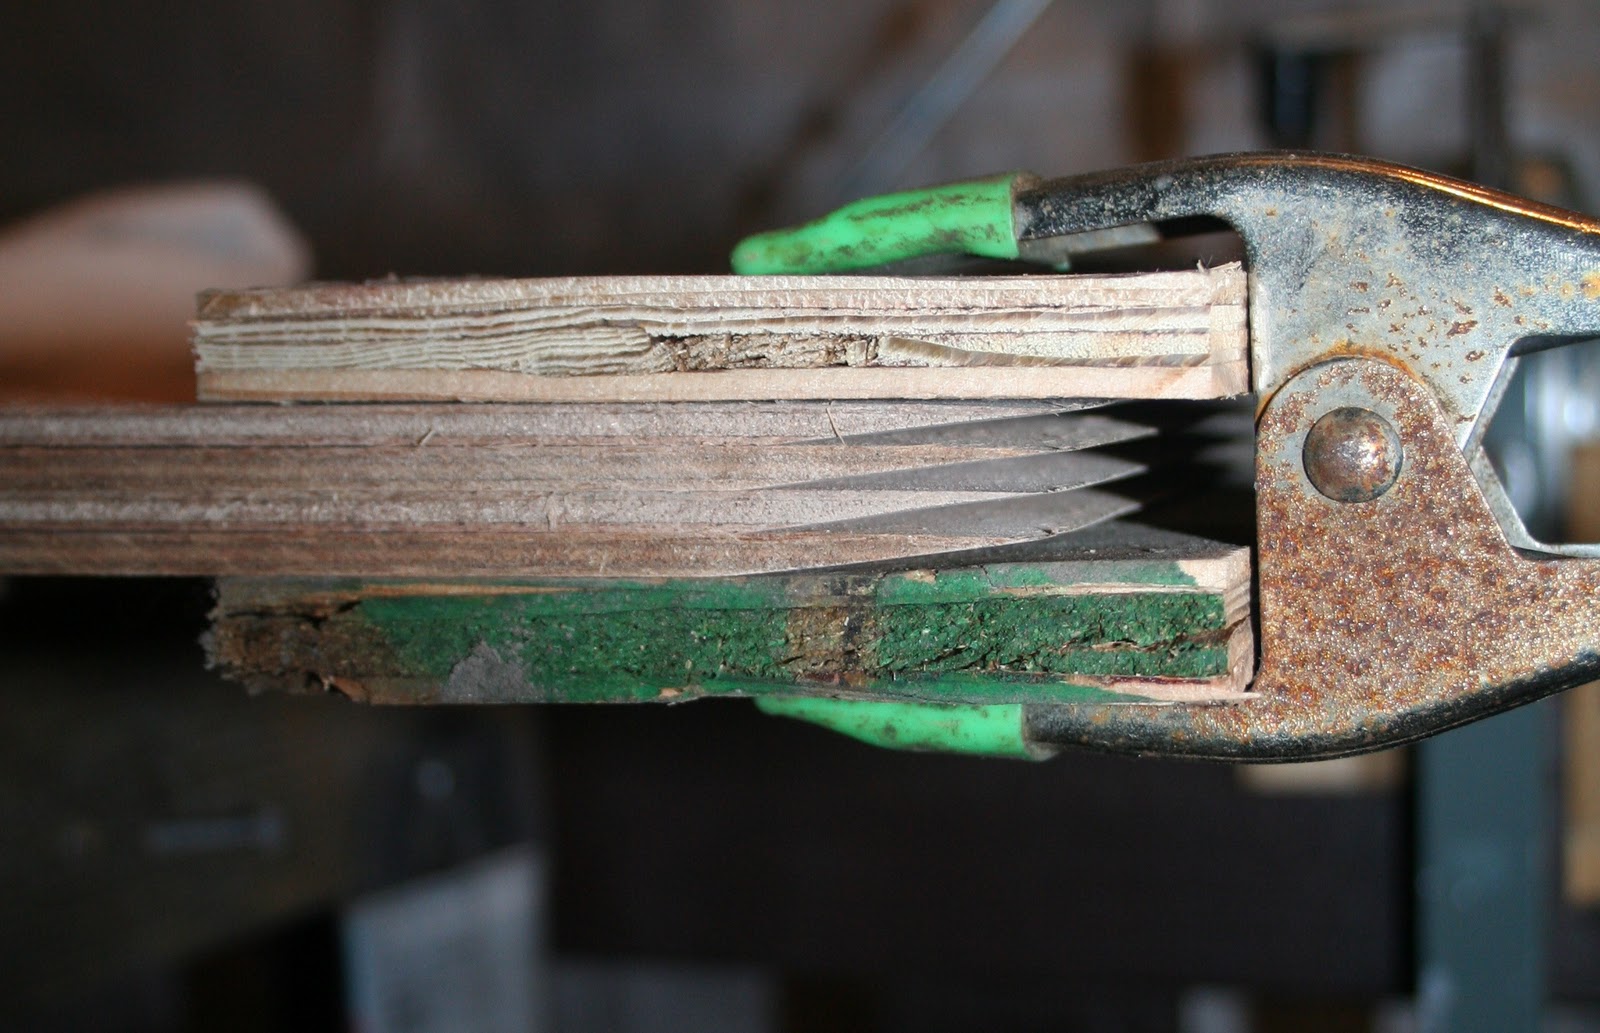
I found it was easiest to start by clamping the assembly firmly at the aft centerline, adding clamps going forward. Cockpit = lamprey.

By the way, you know how it's a herd of buffalo, a murder of crows, a gaggle of geese, a shrewdness of apes (really), a pod of whales, a shiver of sharks (no, really), a parliament of owls, a troubling of goldfish (really, I'm not kidding), and so forth? I'd like to suggest a grasp of lamprey.

And when dey was no crawdads, we et sand..

I wet out the deck with as little epoxy as I could to save weight. The first coat went on with a bondo spreader, and I used just enough to wet out the cloth completely, scraping all of the excess off. The second and third coats went on with a foam roller - very thin coats, just enough to fill the weave of the cloth, with an overnight cure between first and second coats, and about 4 hours between second and third coats.

After 24 hours of curing, I began sanding the deck. I started with 100 grit and knocked the high spots off, being careful not to sand the edges along the chines of the boat. It's incredibly easy to sand right through the glass and into the wood whenever there's a sharp curve or edge. Best to sand those spots by hand or with the sander on lowest speed. After the 100 grit, I moved to 150 grit, then 220 grit. Yep, it's skipping grit, but I ain't building a piano. Also, I plan to install rubrails, which means I don't have to be overly fastidious about the round-over at the chine. I hit that enough to remove the high spots to make sure the rubrail will draw up tight.  All told, it took me no more than about an hour to sand the deck in its entirety (probably less, because whenever you're sanding, one minute feels like five). Next, coaming and hatches.

Monday, April 2, 2012

Glass on deck

It rained buckets yesterday so I decided not to glass the deck, thinking the excess humidity might fog the epoxy, which I didn't want because I'm gonna finish the deck bright. This morning, however, was blue skies. Here, I've got the glass laid on the deck (one 16 foot piece of 27" glass - 3.6 oz), and the edge cut so that there's a one inch overlap down the hulls. I also applied masking tape just below the rub-rail line, sticking only the top edge to the hull, with the bottom edge flared outward a bit. This is a surfboard glasser's trick - any epoxy resin that runs over the edge will run down the tape and drip on the ground instead of down the hull. Makes for no drips or runs, which keeps me from having to sand the runs away after the resin cures.

I used a light misting of 3M 45 spray adhesive along the edges just to keep the glass in place. I find that the adhesive makes the job a lot easier: the glass doesn't shift around or float. It just stays right where you put it. This was necessary today especially. It was very windy and the glass was getting blown around a bit.

Saturday, March 31, 2012

You'll need more straps...


The aft deck went on just fine because the radius did not require a significant bend in the 4mm plywood. First I coated the underside of the deck with epoxy, then I put thickened epoxy along the sheer clamps, fastened the tip of the deck with a bronze ring nail, and then used a nylon strap placed at the bulkhead to hold it in place. I then used a marking guide to draw a line on the deck along the edge to serve as a nail guide, and predrilled holes every 4 inches along this line. I spaced the nails on the aft deck at 4" rather than the recommended 3" because I'm using nails left over from another boat and I only have 112 of them. So, 4" aft of the rear bulkhead where it's relatively flat, and 3 1/4" forward of the rear bulkhead where it's gotta hold a steeper curve, will require 110 nails, which means I can (a) bend two (b) lose two, or (c) bend one and lose one. I'd order more but I'm a cheap bastard. Also, I hate waiting.

The fore deck was a bit trickier because of the 16" radius curvature. I wound up using about 6 nylon straps (the ratcheting kind) to hold it in place while I nailed. Also, the butt blocks were hard to clamp tightly enough to ensure a smooth and level join, so I had to use a couple of drywall screws to draw them up. Once it was nailed, I flipped the boat over and filled whatever gaps there were between the deck and the chines with epoxy thickened so it would just barely run into the gaps on its own. Tomorrow, I'll glass the deck.

All hands on deck

With the sheer clamps and footbrace backs installed, the deck is next. I added a couple small deckbeams fore and aft, and installed a couple of additional bulkheads very near the bow and stern (just visible at the top of the photo at left). Not sure why. The hull was plenty stiff without them. I just wanted some clean storage compartments, really, and I was envisioning tiny little loose things rattling around and getting jammed in those tiny wedge spaces at the bow and stern, so I just closed them off. Then I gave the inside a second thin coat of epoxy. Ready for decking.

Free Foot Braces


CLC sells some really nice adjustable footbraces, and I'm sure they're worth every bit of the $45 bucks they cost, but I'm a cheap bastard, so I decided to make my own foot braces. At first, I was just going to make some non-adjustable blocks and screw them to the hulls like the plans suggest, but I thought that adjustable ones would be nice to have, if for no other reason than very few of my friends are the same height I am. So I searched the tubes and found some pics of some braces another guy invented that looked straightforward enough to make. I cut them out of some oak that used to be a pallet. If you look closely, you'll see that there are stainless bolts sticking out of the bases, about 5 inches fore and aft of the deckbeam. These will serve as pins for the slotted braces, which will slide forward or back, and be held in place by nylon spacers, washers, and wingnuts. So now, that old pallet is no longer cluttering up the place, and I have $45 bucks in my pocket. I think I'll take my family to the movies.


First, I installed some glass tape to stiffen the hull beneath the base of the footbraces (shown here tacked into place with spray adhesive, but not wetted out yet). Then I installed the bases with epoxy. This has an added advantage of not requiring any through-hull fasteners to hold them in place. The last picture at right is of the braces themselves. Note the slots. I'll add more pictures when they're installed on the bases.

Planing the sheer clamps

With the hull complete, the next step is to plane the sheer clamps at the correct radius to accept the deck. Your grandfather's plane will do the trick just fine, but there's nothing like a power planer to make a man feel alive. You can shred your boat into tiny chips in no time flat with one of these, so it pays to go carefully.

The radius on the foredeck is 16 inches, so to make sure I don't plane too much, I made a plane guide of out a bit of scrap plywood. To cut the radius accurately, i made a compass out of my router and cut it with an edging bit: anchor one end of a 16" stick to the scrap plywood, clamp the other end to the router, and viola, a circle-cutter. Of course, I wasn't interested in the circle. I was interested in the outer part. Here's what my plane guide looks like, and the close-up shows how it's used. I simply planed the chines until they matched the guide.
 
The aft deck gets similar treatment, except with a 60" radius, which is not far from flat. Between the rear bulkhead and the deckbeam is what's called a "rolling bevel," which means that the curvature of the deck goes from a 16" to a 60" radius. It sounds fiddly, but it's not. I freehanded it with the power planer in no time.

Sunday, March 4, 2012

Graphite Bottom

After reading lots of posts on the CLC forum, I decided to apply a graphite/epoxy mix on the bottom. The reason is three-fold. First, apparently it makes the bottom very slick so that when you paddle over rocks or drag your boat over the reef, it doesn't scratch nearly as readily as it would if it had a bright finish (or maybe it just doesn't hurt your feelings as much). Second, it takes care of the UV problem that unfinished epoxy suffers. Third, I think it's going to look good.

So first, I masked a line just above the chines and put two more coats of unthickened epoxy along the sides. This was enough to fill the weave of the cloth to an acceptably smooth finish. I should say I don't plan on spending much time sanding this thing and varnishing it shiny like a Steinway Piano - I plan on paddling it around instead, so perhaps my acceptable level of smooth wouldn't be smooth enough for the next guy. If so, my advice to the next guy would be 'build your own damn boat.' Still, it's pretty smooth.

I scratched my head for a little while trying to figure out a way to apply the masking tape in a straight line and even found myself at the building supply store looking at laser levels, but then caught a glimpse of myself being absurd enough to actually think about buying a laser level just to put a straight line down my hull and I snapped out of it. I'm a cheap bastard. Instead, I applied it by eye. My reasoning was that if I can get it straight enough not to bother me when I'm actually concentrating on how straight it is, it probably won't bother me later when I've forgotten all about it and am just busy paddling around. And if it bothers you, well, build your own damn boat.

I mixed about 3+ ounces of graphite powder (about $10 for a pound at a local art supply store) with 9 ounces of epoxy to make a slightly thickened and very black mixture and rolled it on in a thin layer with a foam roller. (I measured the graphite by volume fairly roughly using a 3 oz Dixie cup). The second graphite layer only required 6 ounces of epoxy, as did the third. Next I'll remove the masking tape and hopefully will be rewarded with a two-tone hull with a nice clean line. And if it ain't straight enough for you, well.. you won't be able to see it from your house anyway.

Glass bottom boat

Here's the boat with the fiberglass draped over and ready for epoxy. The plans called for 6 oz glass, but I bought 5.6 oz instead because that's what was available. I'm sure the strength difference isn't going to be noticeable, nor will the weight savings either. Notice Stanley, the project foreman, checking to see that I'm complying with all safety regulations. He's inspecting the sawhorses to make sure they're strong enough. 

It was a bit fiddly to get the glass to lay down along the bow properly, so I cut it with a razor and a straightedge, overlapped it around the bow by a half inch on either side, and then stuck it in place with 3M 45 spray adhesive. (Similar at the stern). I then worked the glass over the hull with a bondo spreader, hitting it here and there with the spray adhesive to hold it in place and make sure it wasn't gonna float when I applied the epoxy. Probably completely unnecessary, but it did make wetting out the cloth easier. No big bubbles, and it allowed me to use a minimum amount of epoxy.


Here's what it looks like with one coat of epoxy. It required about 10 ounces of epoxy to wet out the whole boat (or perhaps 14 - I can't recall how much epoxy I mixed). I was pretty careful not to use any extra  - just the minimum amount required to make the cloth go from white to clear. (In the picture, it looks like some places are still white, but that's just the glare - the glass was completely saturated). The procedure was easy enough, and it took about 20 minutes or so to do the whole boat. I poured a couple of ounces on the middle of the hull and worked it with a bondo spreader toward the edges then down the sides, and then repeated until the whole thing was done. I wound up with a bit of epoxy left over, so I mixed it with wood flour until it was thick, then applied it to the inner bow. I've been doing this every time I have a bit of resin left over - i just thicken whatever's left and smash it into the inside of the bow - and it's building up quite nicely in there, which will save some resin when it comes time to do the end-pour.

By the way, I'm using the West System pumps on my Resin Research epoxy with the volume limiter installed on the hardener side, so one pump of each delivers about 3 ounces of the correct 2/1 ratio of resin/hardener. I'm very pleased with the Resin Research product. It hardens in a reasonable time, and it's blushless, which means it doesn't form water molecules as a by-product of the reaction and so it's very clear. As you can see, I've used about 3/4 of a gallon of my 3 gallon kit so far. At this rate, I may well have enough left over for Crescent to build her boat.

Peel Ply

I used peel ply on the middle section of the interior hull. Peel ply is a finely woven polyester cloth designed to be applied on top of the wetted-out glass then peeled off after the epoxy cures. It allows for really nice control of the epoxy on wet-out, and when you peel it off it leaves a perfectly serviceable mat finish. Still, I don't think I'll use it for the exterior glassing. I want a more glossy finish, which will require multiple coats of epoxy anyway, so it seems peel ply on the outer hull would just be a wasted effort.

Wednesday, February 22, 2012

Fillets- clean enough for Bill Gates, but not Steve Jobs


Here's what the fillets look like after the masking tape is removed. If I had been a bit more careful when I was applying the little dabs of epoxy that allowed me to remove the wires before filleting, the fillets would've been much cleaner. As it is, though, once I put the glass tape along each fillet and paint the whole thing with unthickened epoxy, this picture will be the only evidence that the fillets weren't perfectly clean. Steve Jobs would've probably started over, but he's dead now.


Here, the 3" glass tape is laid along each fillet, and next I'll coat the whole thing with unthickened epoxy.

In addition to glass tape, the inner hull between the fore and aft bulkheads gets a layer of 6 oz. cloth to add strength and stiffness beneath the seat and to protect the floor from the wear and tear of getting in and out of the boat. I ordered some peel-ply from Fiberglass Supply, and am planning on trying it out on the inner hull lay-out before I decide whether or not to use it for the exterior glassing.

Making Fillets


The weather threatened, so I had to move the boat under the covered porch and then suspend it level on the horses and re-align it using the winding sticks. Once it was level and aligned, there were a few flat spots along the keel. To remove these flat spots, I loosened the stitches and inserted a few wedges (Home Depot: $1.45 for a dozen, and well worth it) between the panels along the flat spots, pushing down on the panels until the keel line followed a smooth curve. I then dabbed a pinch of thickened epoxy between each of the wedges, as well as between each of the stitches along the entire hull. This allowed me to remove all the stitches after the epoxy tabs cured, which means I can make fillets without having to deal with the wires being in the way, which is important because I want to make thinner - and therefore lighter - fillets. 

Here, the wires have been removed and the keel and chines have been masked so I can apply the fillets. I found that those Home Depot wedges make excellent epoxy stirrers, are really great for applying thickened epoxy along the joints, and do a much easier job of filleting the centerline than the 1" radius filleting tool I made. The angle between the bottom panels at the keel is pretty flat, so to get a consistent fillet, I had to hold the radius tool at a shallow and constant angle as I dragged it, which was fiddly and hard to get right. Using the thin edge of a Home Depot wedge, though, which bends into a nicely sized radius when wielded at a low angle, I found that I could manage the thickness of the fillet simply by managing the application pressure. It made for much smoother fillets down the centerline. Also, the wedges were excellent for scraping up the excess epoxy that squeezed out of the fillets. Go get yourself a dozen, at least.


Winding the hull

With the hull wired together, I then leveled it and made sure it was aligned along it's length (so-called "winding" the hull). As you can see in the picture, the ground isn't level, and I doubt the sawhorses are exactly the same height either. It's not necessary, however, to have level sawhorses or level ground to properly align the boat. It's enough simply to suspend it level from the sawhorses. To do that, I screwed two pairs of upright sticks to the sawhorses and then clamped the boat to those sticks so that it was level.

Next, I checked for alignment along the lenth with the aide of long sticks across the hull about 1/3 and 2/3 along its length. Note that the front stick and the rear stick are aligned, which means that the front 1/3 and the back 1/3 of the boat are aligned. In a mis-aligned boat, those sticks would not be parallel with one another. In this photo, it looks like the sticks are tilted down to the left, but they're actually level according to the spendy Tennessee Mason's level that I bought at an estate sale for $2. I'm a cheap bastard.

This shot was taken before I squared up the bow. It was twisted slightly out of vertical, so I loosened the stitches a little, gave it a twist so it was vertical, and re-tightened the stitches. Next, with the boat aligned and level and the bow and stern vertical, I'll "fair" the hull - which means I'll sight along the keel and chines checking for dips, bulges, flat spots, etc.

Tuesday, February 21, 2012

Hull

I started at the bow and alternating sides, added four or five stitches at a time, until the entire hull was stitched together. With a bit of attention to making sure the panels were coming together evenly, the hull begin to resolve nicely into a satisfyingly kayakesque shape.

I include the picture below not to show the hull, but to showcase my excellently adorned sawhorses. Ji Xia and I made them for this project out of scrap wood from the city dump (I'm a cheap bastard), and she was kind enough to paint scenes on them for me. Notice the fine rainbow she painted on the one at left, and the startlingly realistic painting of her playhouse on the one at right. It shows the roof architecture in impressive detail, as well as a true-to-life rendering of the swing, with its yellow chains and green seat. You can see part of the actual playhouse in the background at right.  She's an excellent painter of playhouses, rainbows, and other things. (Thanks again, Uncle Stinky, for the playhouse!)

Monday, February 13, 2012

Sixty stitches along the keel.

Next, I loosely wired the bottom panels together along the keel line. The straightest edge defines the keel, and the gentler of the two end curves is the bow.With the panels wired together, I'll then turn the side panels over (sheer-clamp side down), put some spreaders across the panels, and put the bottom panels in place in preparation for wiring the bottom panels to the side panels. (Note: the picture shows them wired together a bit too tightly. I had to go back and loosen them so I could unfold them properly.)

Yep, it's pointy on both ends

 With the sheer clamps glued to the side panels, I wired the panels together at the bow and stern and used a spreader-stick to define the proper beam and was rewarded with the first clear hint as to what the boat will look like. (As you see, I didn't have 18 gauge copper wire handy, so I used zip-ties instead). 


Thursday, February 9, 2012

glue in hand...

The folks at Fiberglass Supply shipped the resin, fillers, and cloth lickity-split, and the first thing I did was mix some cab-o-sil thickened epoxy and glue the sheer clamps to the hull sides.

Q: How many clamps does a guy need?
A: Just a few more...

Friday, February 3, 2012

Long time gone..

I haven't touched the boat since I glued the deck beam together, but today, I put in an order with the fine folks at Fiberglass Supply for the cloth and epoxy and other stuff. Their prices are the best on the web, and they supply Allen with his materials. They know what they're doing. You're not going to find nicer folks, better prices, or better stock - it's cheaper by far than ordering the glass and glue from CLC, for example. On recommendation from Allen, who's mixed untold gallons of epoxy of all kinds in his life, I went with the Resin Research product with a fast hardener so I won't have to wait around forever in this miserable upper-60 degree sunny February weather for the glue to cure.

In case it helps, here's my supply list, with cat numbers from Fiberglass Supply. You may notice I ordered waaay to much epoxy for one boat ( I ordered a 3 gallon kit). The extra is for Crescent to use when she builds her boat. I also ordered a couple yards of peel ply. Allen says it's easy to make really nice fillets with it.


Item Cat # Quantity Unit Cost/Unit Total
3" glass tape C34-2521 1 50 yd roll 20.00 20.00
Deck glass (3.6oz x 27") C06-1229 6 yds 3.11 18.66
Hull glass (5.6oz x 50") C31-1287 8 yds 6.49 51.92
Peel Ply M05-0739 2 yds 4.12 8.24
resin research epoxy G02-0140 1 3 gal 178.00 178.00
Cab-o-sil J42-0541 1 lb 11.51 11.51
Pecan Flour J16-4281 1 5 qt 19.68 19.68
microspheres J05-1449 1 quart 9.58 9.58
Resin pumps/meters ? 1 pair
0.00
Disposable brushes T09-3320 5 each 0.94 4.70
4" Roller T10-4316 1 each 3.96 3.96
4: roller covers T10-4980 5 pair 2.5 12.50
1 oz grad cups T19-9085 20 each 0.11 2.20
3 oz grad cups T19-9122 20 each 0.25 5.00
Nitrile Gloves X71-4317 1 box of 100 12.05 12.05


TOTAL 358.00

Thursday, January 19, 2012

Gluing the deck beam

The boat has a single deck beam that's laminated from 5 pieces of 4mm plywood. They're 2" wide, but I'll cut the beam to about 1.5" when it's dry. The radius of the finished beam is 16", so the plans call for a 15" radius gluing mold to allow for a little bit of spring back. I started clamping in the middle and worked down to the ends. With 15 plies held together by epoxy, you could probably park a buick on this thing. By the way, I'm clamp-wealthy, despite being a cheap bastard. Also, I think some googly eyes would make this picture much better.

Wednesday, January 18, 2012

My tools are older than I am..

With the four main panels cut, I plowed into cutting the rest of the pieces - the forward and aft hatch covers, risers, doublers, and so forth. It seems like a lot of parts when you first see the plans, but there's really a surprisingly small number of parts and pieces. I think it speaks well of the CLC folks and their design - to paraphrase A. Einstein, this boat seems to be as simple as possible, but not more so.

Along with cutting panels, I also scarfed the sheer clamps together to make 16 feet lengths of 3/4" by 1 1/2" straight grain fir. The plans call for a conservative 8:1 scarf angle rather than the customary 12:1 because these pieces will be joined to the side panels, which in turn will be glassed, so an 8:1 joint will be plenty strong.  For 3/4" stock, 8:1 means a six inch hypotenuse. The Japanese pull saw is the ticket for cutting scarfs in this kind of stock. It's really easy to get accurate results if you go carefully. I marked the angle, dropped a perpendicular as a guide to make sure I was cutting square, and cut these four ramps by hand in about 15 minutes. A couple of minutes touch-up with the plane and they were ready to glue.

I followed the same gluing procedure as I did with the ply: put down some wax paper, align the sticks along the front edge of my benchtop to make sure they're straight, slather some  epoxy thickened with wood flour onto the scarf (I used dust from my sander again), position them longitudinally, send a finish nail through the joint to keep the sticks from sliding under clamping pressure (I drilled a pilot hole to make it easy), and repeat with the other two pieces to make a stack two high, then clamp the stack. It's another cold night, so I'll put a cardboard box around the glue joint and put a light inside.

Tuesday, January 17, 2012

Laying out the panels

The epoxy was a bit slow because, well, it's January. It took two days to cure. The second day was chilly for Santa Cruz standards - in the low 50s - so I enclosed the joints inside a makeshift box and put a heater in the box to keep the epoxy warm (every 10 degree temp increase doubles the reaction rate).

After the epoxy cured, I cleaned the panels up with a sander then marked the stations according to the offsets in the plans and laid out the sides and bottom panels using a fairing baton. Here, I'm transferring the full-size bow profile from the plans onto one of the bottom panels by poking a sharp awl through the paper into the wood. I cut a little window out of the plans so I could see to line up the paper correctly. Next I"ll screw the two side blanks together, and the two bottom blanks together, cut them out with a jigsaw two at a time, and finally touch up the edges with a hand plane.

Sunday, January 15, 2012

Lam Sandwich

There are a couple of things to pay attention to when you're gluing the scarf joints. The first is aligning the panels so they'll have a straight edge. I popped a bright orange chalk line on my bench top to serve as a guide. If you wind up with 16 foot blanks not properly aligned, it's really no big deal - you'll just have to pop a line on the blanks themselves to serve as a baseline when you do the layout. Hopefully these will be straight enough that I'll be able to use the edge of the panel as a baseline. Less cutting that way.
The other thing to get right is clamping the joints. Because you've cut little ramps into the wood, and you'll be lathering them up with slippery glue mixed with a bit of thickener (I used dust from the bag of my finishing sander), they have a tendency to slide apart if you don't clamp them down really well along the length of the boards. Alternatively, you can apply the glue, line things up, then hammer a couple little finishing nails through the scarf joints to keep them from sliding. And of course, before you do that, put tape along the scarf lines (both sides) and wax paper between the sheets to keep the scarf joints clean along the glue lines and the sheets from sticking together when the excess glue squeezes out. If you look closely, you can see the blue painter's tape under the board. It's on each side of each panel. To supply the clamping force, I cut a 2x4 a couple inches longer than the blanks are wide, and I screwed one end of it to the benchtop and clamped the other to the edge of the bench. Now it's just a matter of waiting for the epoxy to react...

Saturday, January 14, 2012

8 + 8 = 16LT

Making the scarf joints to glue the 8 foot blanks into 16 foot blanks has the reputation of being one of the hardest parts about building this boat from plans (rather than the kit, which comes with pre-cut panels that go together via jigsaw puzzle joints), but it's not really hard at all. It took more time to recondition my plane and sharpen the blade than it did to make the scarf joints. A sharp tool is the key - mine's sharp enough to cut your eye if you look at it too long. And notice in the pic below that I put it down on its side, not on the shoe. If ever I put a plane down on the shoe when my grandfather, who was a carpenter, was around, he would walk over and grab my hand and make me pick it back up and put it down correctly. Teaching via external control of my motor neurons. My grandfather is the old guy in the middle. I'm the little pissed-off kid on the left. Apparently, I wasn't old enough to hold a turnip of my own.

So with your sharp tool at the ready, you measure 1 1/4 inches and mark a line on each panel, offset a stack of panels to these lines, with the bottom one aligned with the edge of your workbench, and start planing. The stair-step panel arrangement holds the plane at the proper angle, and it's really quite easy to cut the scarfs uniformly - the ply reveal gives you a constant indicator of how even you're cutting. (BTW, I built the workbench with this project in mind: it's about 12' long and 14" wide - plenty adequate for the project but it doesn't take up my whole porch.) 

Once the scarfs are cut, the leading edges are paper thin, so they're obviously really fragile. To keep from dinging them up, I clamped some scrap wood on the ends to protect them until it's time to do the glue-up.

The first cut is the deepest


Here's a nice exploded view of the kayak from the construction manual.  If you order the kit, it comes with all the pieces pre-cut. If you're building from plans only, you get to make them yourself.


 At $70 a sheet, you measure at least three times and cut once. The sides and bottom panels start out as straight rips. If you're working by yourself, 4X8 sheet product is not wieldy especially if you don't have the luxury of having a table saw set up for cutting panels, so to help hold the outflow to prevent the sheet from flipping up off the blade I nailed a support to the porch rail.

One other detail... the side panels will be made from the 9.5 inch wide blanks ripped on the table saw, and the bottom panels will be gotten out of the 11 inch wide blanks. But if you use your table saw to rip your plywood to make all four bottom panel blanks, you won't have enough panel left to make the aft hatch. Instead, you have to cut one of the bottom blanks with a jigsaw. Study the panel cutting layout on the plans (page two) and you'll see why. So after I cut two 9.5 inch blanks and one 11 inch blank from each 4X8 sheet I just did a quick and dirty layout of the remaining bottom panel (measured using the edge as baseline and added a half inch or so) and cut it with a jigsaw. Just to check, I put the full-sized aft hatch cover template on the remainder before I cut - plenty of wood left...


Materials

The boat goes together from 3 sheets of 4mm Okoume marine plywood and a half sheet of the 6mm. It ain't cheap (~ $70 a sheet), but it's very high quality. Because I'm a cheap bastard, I was tempted to use lauan at $10 a sheet, but if you've ever used lauan, you know that it's full of voids and the filler between the plies is flimsy wooden styrofoam. Of course, Allen's boat uses rigid foam between epoxy and glass and it's stupendously strong, and given that most of the strength derives from the layup of epoxy and glass, I suspect that lauan would work just fine. But word from the CLC shop tips page nudged me up the food chain. Since I'll be putting a few hundred bucks worth of epoxy, glass, and fittings into the boat, I decided to throw in for good wood. I got it from the folks at Edensaw in Port Townsend, WA, along with some clear straight grain fir for the sheer clamps.

O.K., so here's really the way it fell out. Uncle Stinky bought this wood from Edensaw so that he could build a kayak at the same time as Crescent, but with his many projects in the works, this one didn't come to fruition before his travels continued. He generously left the wood in the greenhouse for us to use. Thus, I'm making a boat from really quality wood. Those who know Uncle Stinky know that he never never never buys cheap shite - only the best. In this case, Joubert Ply.


The Joubert seal signifies that it meets or exceeds British Standard 1088. It's registered with Lloyds of London to be free of voids, be of uniform thickness and be glued together with uniform glue spread and pressure, and to be low in formaldehyde out-gassing - as if I give a shite about out-gassing.  But if it's good enough for Lloyd and for Uncle Stinky, I'm sure it'll work for me.

Friday, January 13, 2012

I have a plan...

The plans and construction manual cost $70, which gets you a detailed step-by-step procedure, drawings with offsets, and full-sized templates for the tricky shapes, like the lines on the bow and stern, the hatch coaming pieces, and the like. Also, with the purchase of a plans set (which is really a build license), you get to call the CLC shop in Annapolis and ask questions. These are really Crescent's plans - she's gonna build her boat later. When she starts, we'll send CLC another 10 bucks for an additional build license.

The plans don't actually come in the wooden box. I threw that together to give Crescent the plans in for her birthday. It's made of scrap redwood left over from the outdoor shower I built in September, which was made of scrap redwood from the city dump. I'm a cheap bastard.

What to build


So, while my brother is busy in Hood River, Oregon, building Mariana, an ultra high-tech blue water 44 foot sailing catamaran, I decided to knock together a more modest vessel here in Santa Cruz. If my job doesn't get in the way of my free time, I'll be paddling my Chesapeake Light Craft 16LT kayak out past the point break at Steamer Lane by mid-spring late spring.

I chose the CLC boat because quite a number of people posted favorable things about it on the Internet, including a bunch of readers of Sea Kayaker magazine (who knew there was a mag for sea kayakers). They voted it the best D-I-Y kayak out there. I know fock-all about kayaks, but you gotta assume that the readership of SK mag is obsessed with them, so it seemed like a good enough endorsement.